
Hey everyone! I made a really nice fire agate ring not too long ago and managed to capture some of the progress with my camera. Here's how the whole thing went down...
I started with a really nice natural cut fire agate and some 22 gauge fine silver for the bezel.

Using a clamped marble block, I bend the bezel around the stone with my fancy measurin' tool keeping the bezel pinned between the block and the stone. This secures the bezel and keeps it tight and even with the form of the stone.

Now it get's a little tricky, the dreaded inward curve. I use pliers and manually make an inward curve as close as I can get. This takes some playin around to get right, but it is worth it when the time comes to set the stone.

So here I have all of the curves worked out and the bezel is ready to be cut and soldered. I make sure to make the seam on the flattest part of the stone, in this case on an outward curve. Working with a seam on an inward curve is just not going to be fun.

Now for my special trick! Wood dowels, my secret weapon of choice for setting these fire agates(and some other tricky settings too). I can push and stretch the bezel to fit very close with no scratching, smooshing or marring of the silver. I also use wood dowels to set the stone on the inward curves(not seen in these photos). They stretch the bezel on the curves so nicely, and you can shape them how you want depending on the tightness of the curve. Really good for hard to reach spots!

There she is! Ready to solder to the base.

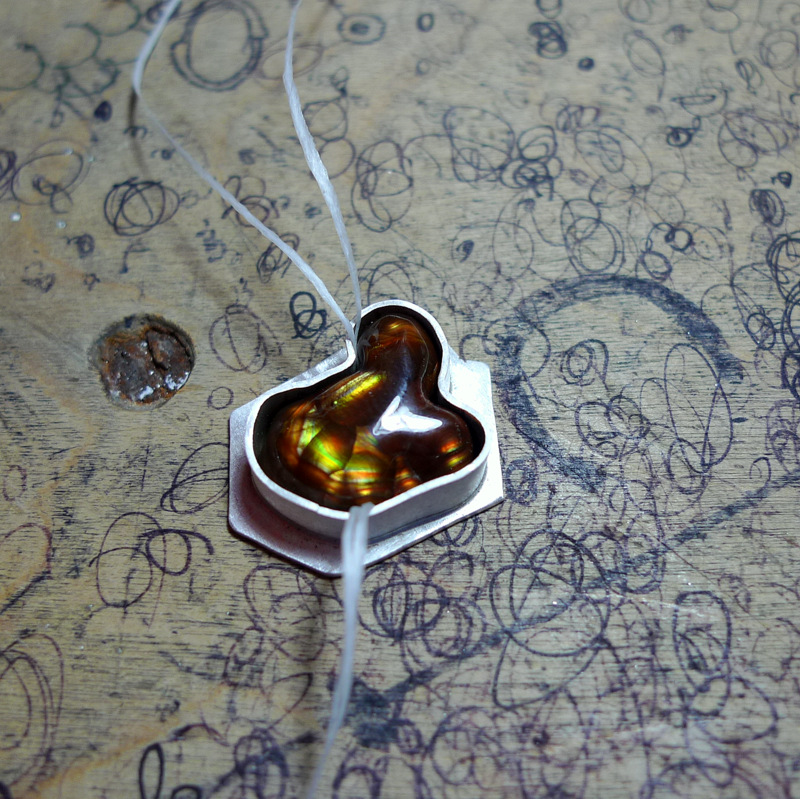
Now that it is soldered to the base, I draw a line around the bezel letting me know a safe max height for the additional doodads. I want to be sure that I am going to have enough room to set the stone. I use dental floss to prevent the stone from getting stuck.
And now... DOODADS!
My customers love lots of bubbles!
My customers love lots of bubbles!

Smooshed solder to place under the silver balls for a nice clean seam.

Here it is all fluxed up, solder in place, ready to flow. I like to solder the first level of silver balls, then go back and add the second level of balls, then re-flow everything all at once for a nice continuous smooth seam. I use medium solder for everything here. I am a medium solder freak! I hate hard solder.

All soldered up and the base has been cut and shaped.

The band has been soldered on, and now I draw another line around the bezel letting me know how far to grind it down, paying attention to the various heights of the stone.

Here the bezel has the proper heights and has been smoothed out. Final details are now added as well.

Oxidized with liver of sulfur and a pre finish has been added. Ready to set!

All set, and polished! Mmmmm fire agate!

A masterclass! Thanks Bill!
ReplyDeleteSeriously, Dude, if you ever decide to teach classes in person, I'd be signing up. Your work is fabulous. Thanks for sharing.
ReplyDeletegreat insight & gorgeous ring! thank you for sharing:)
ReplyDeleteThanks everyone!
ReplyDeleteAmazing!
ReplyDeleteJust Fabulous!!!
ReplyDeleteThese are like mini tutorials. I just love when you do these!
ReplyDeleteThanks all! Glad you enjoyed this post!
ReplyDeleteLove your work and so glad I stumbled on your site today! Do you always use thicker bezel wire (e.g. 22 gauge vs. 26 or 28?
ReplyDeleteThanks Barb!
ReplyDeleteI use the thicker bezel whenever possible, but when I set small stones I will go down to 24 and then 26 for really small stones(6mm or smaller).
Excellent. Thanks for share it
ReplyDeleteAlways fun to watch a master at work! Thanks for sharing!
ReplyDeletesimply fabulous --- organic, giddy design
ReplyDeleteThanks Kevin!
DeleteThanks everyone!
ReplyDeleteGreat tutorial thank you so much!!! Very helpful!
ReplyDeleteThanks Tim! Glad people are still finding this blog helpful!
ReplyDeleteReally cool work. I appreciate the tutorial, I always learn new tricks from other artists. When you say you "grind down" the bezel to your line, do you file, use grinding wheels, a combo or what? I find that part fairly challenging, but maybe that's because I'm using FS bezel wire, which is much thinner than your 22ga.
ReplyDeleteHi Mark, thanks!
ReplyDeleteLately I use my rotary hand piece with sanding drums to grind the bezel down. I start with a heavy grit and then clean it up with a finer grit. You can use 1/4" drums for smaller curves and 1/2" drums for bigger. Also for some pieces, I have the wolf belt sander to work the bezel on my bench which helps a ton! Very handy tool! Hope that helps!